M2//S2 A2.1 Portraits
- Due Jan 19, 2023 by 9pm
- Points 10
- Submitting a file upload
- File Types jpg
Lighting is the foundation of photography.
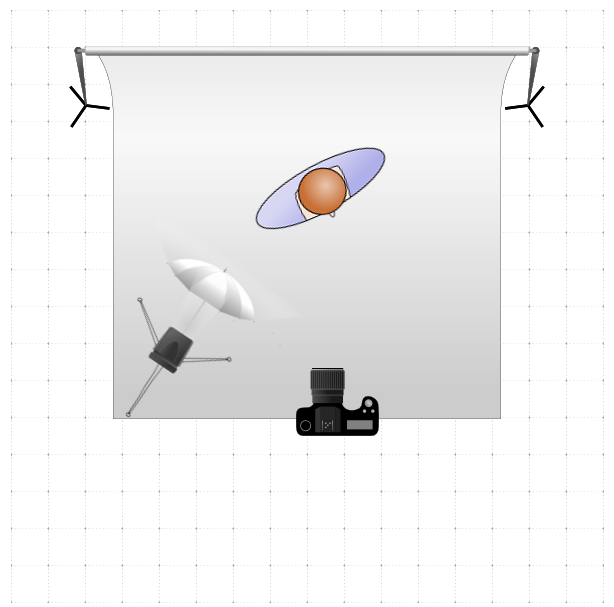
There are infinite ways to set up portrait photography lighting, but most here are some techniques used by professional photographers.
Each of these portrait lighting setups can be achieved with just a single light source, which you can easily modify, intensify or supplement to produce endlessly different effects.
Whatever your skill level, these different types of portrait photography lighting setups will equip you for a vast range of situations. Learn how, and what you need, to create each one.
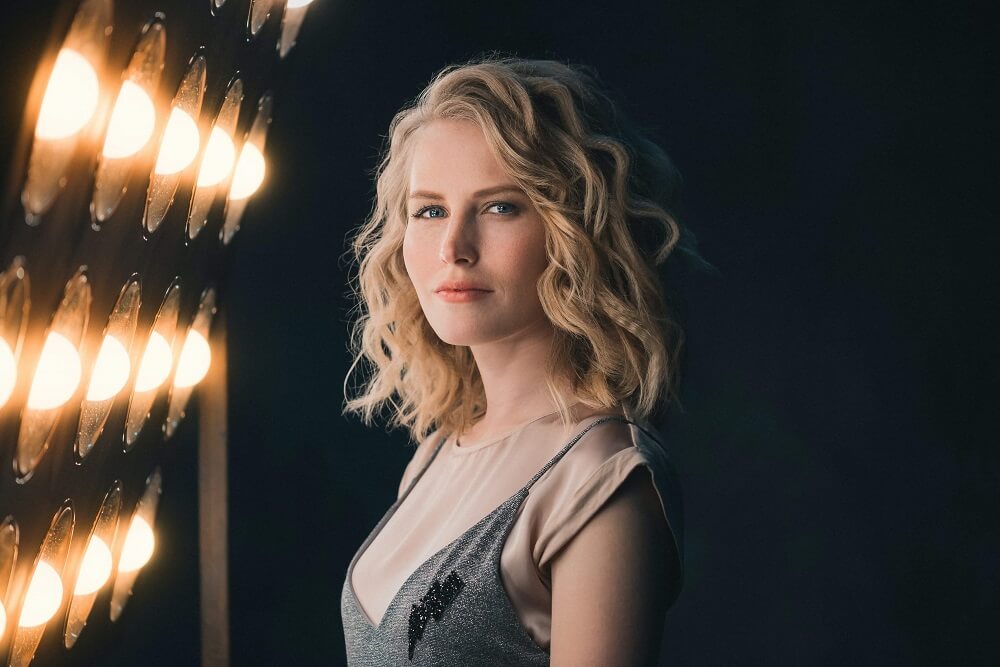
Catchlights
Catchlights—a reflection of the light source in a subject’s eyes—are considered essential to any great portrait. Without the sparkle of catchlights, eyes tend to look somewhat dull and lifeless.
Being reflections, catchlights will take the same shape as your light source (e.g. square for softboxes, round for beauty dishes) so bear that in mind if you’re after a particular look.
Catchlights are also a good indicator of how high to position your light.
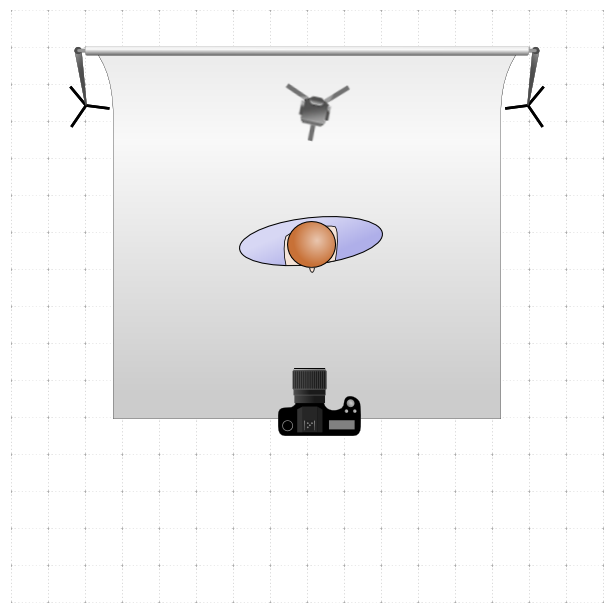
In most of these portrait photography lighting setups, you can change the angle of your camera relative to your subject without greatly affecting the overall pattern of light and shadow.
What’s important to achieving each look is where you position the light in relation to your subject.
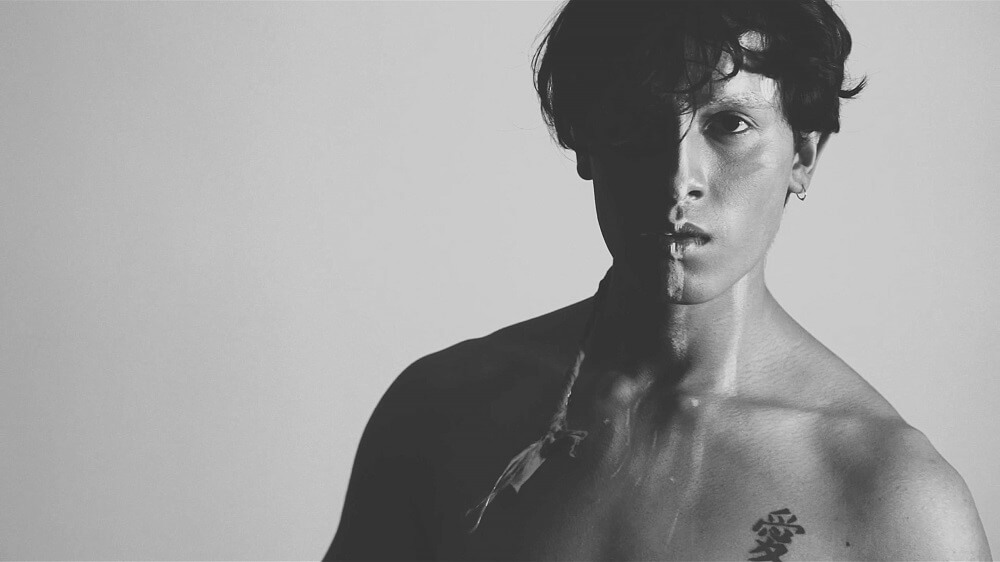
Split Lighting
Split lighting effectively ‘splits’ the face into two halves: one lit, the other in shadow. This creates a dramatic, even mysterious, look that you can emphasize by increasing the contrast between brightness and shadow.
To create split lighting simply place the light source at 90° to the subject.
For greater contrast between dark and light, increase the light source’s brightness or move it closer to your subject while minimizing the amount of light that hits the shadow side.
For less contrast, dim the light source, position it further from your subject, and/or fill the shadows using a reflector.

Loop Lighting
Loop lighting is one of the simplest and most popular portrait lighting styles. It subtly defines facial features with soft shadows on the cheek opposite to the lighting.
Loop lighting will flatter pretty much anyone.
To create loop lighting position a soft light source (e.g. diffused sun, flash or continuous light) at about 45° to your subject, just above their eye level and angled slightly down.
Adjusting the angle and height of the light will change the appearance of your shadows, so play around until you’re happy with the effect on your subject.
To soften shadows, place a reflector or fill light on the opposite side of your subject.
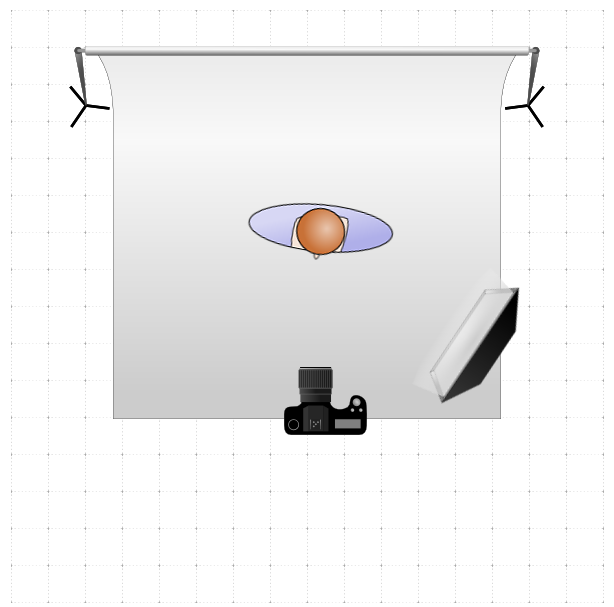
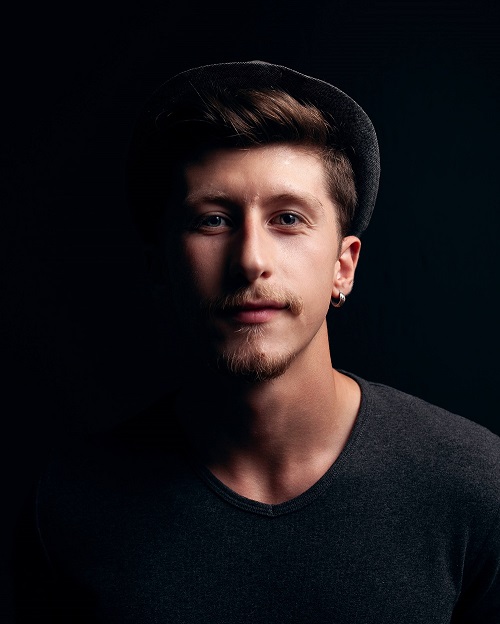
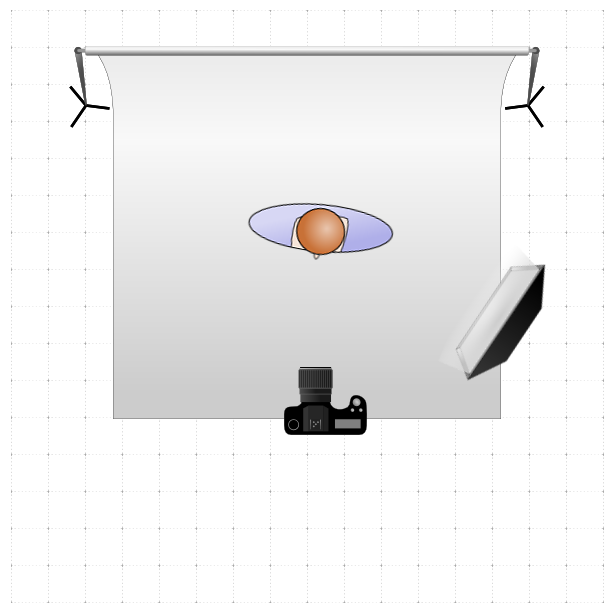
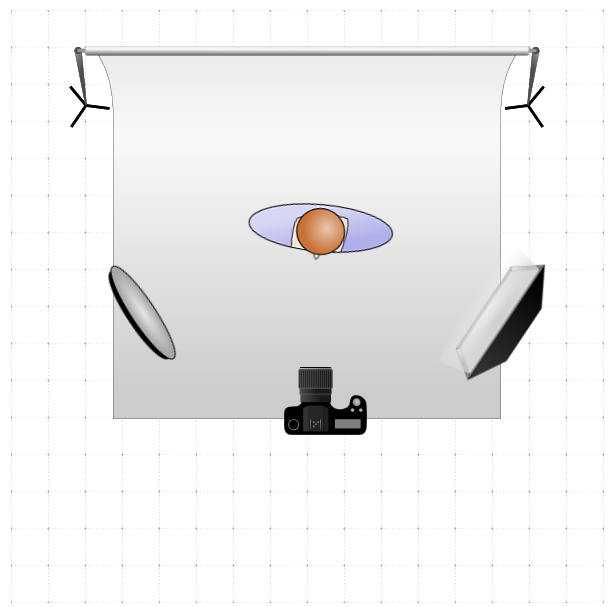
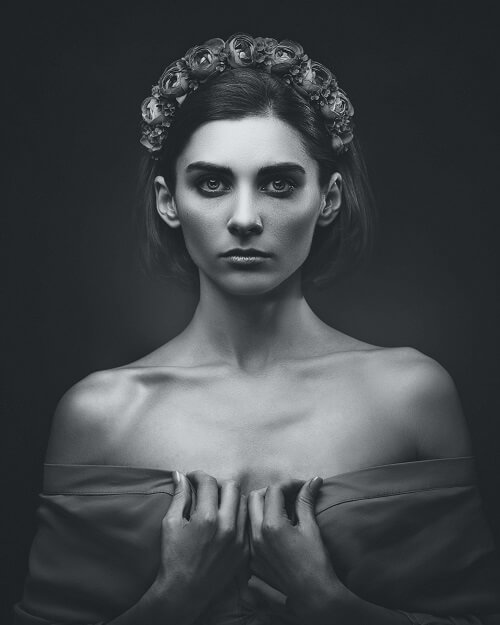
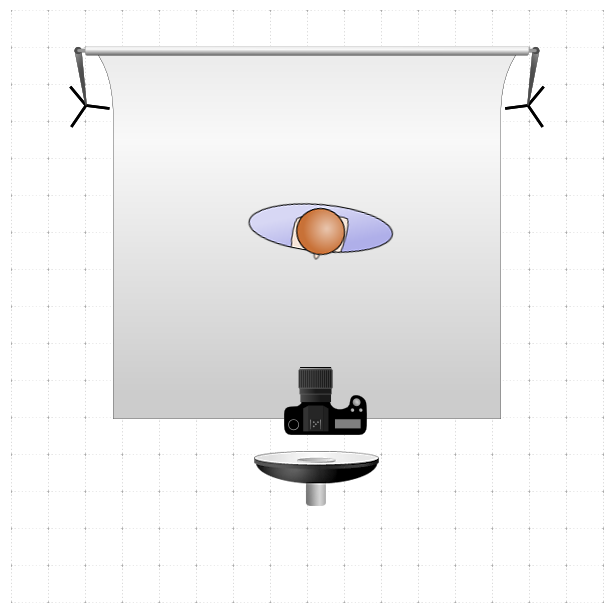
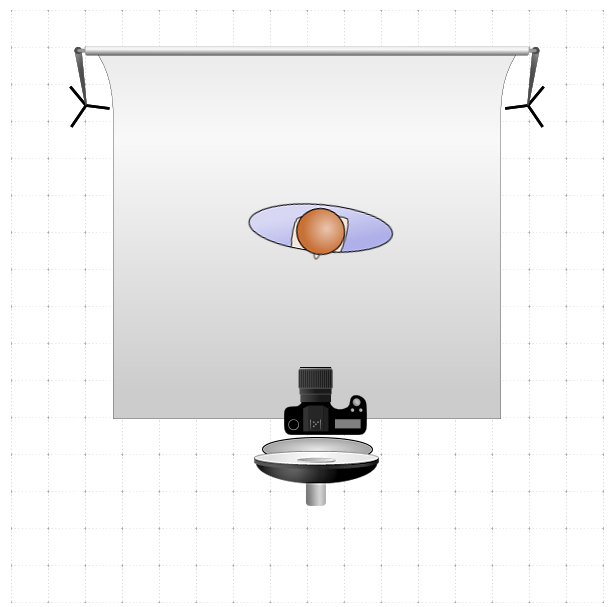
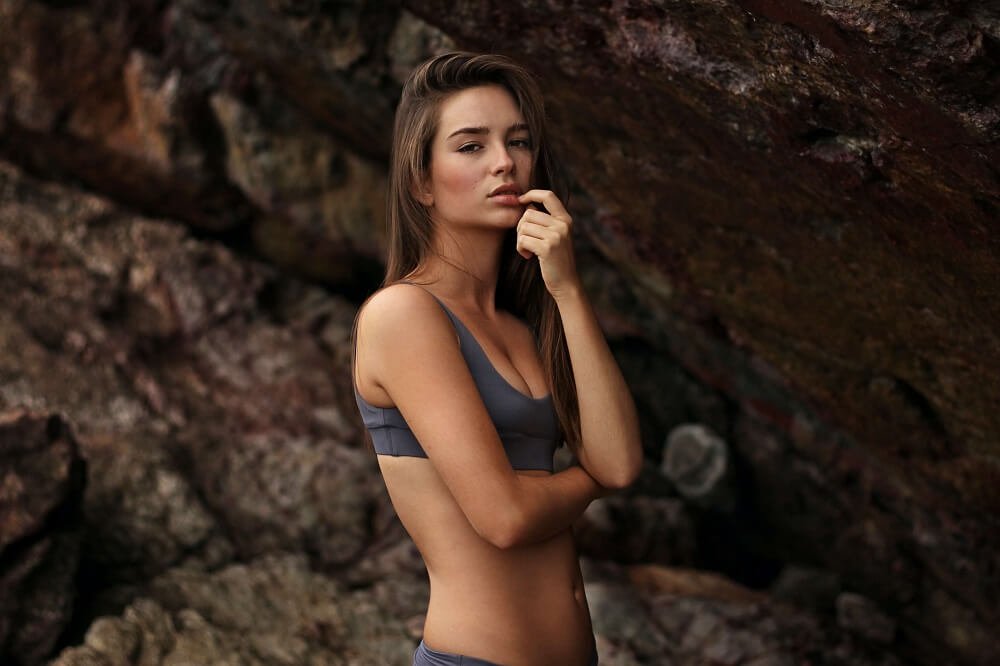
Rembrandt Lighting
Rembrandt lighting takes its name from the Dutch painter whose portraits often featured this style of lighting. This portrait lighting technique is similar to loop lighting but with a distinctive triangle of light on one cheek, formed where the nose and cheekbone shadows join.
Left: Example of one-light Rembrandt lighting setup
Right: Example of Rembrandt lighting with fill
To create Rembrandt lighting position your light at about 30° to your subject, a bit above their head and angled slightly down. Adjust the height and angle of the light to suit your subject’s face and bring catchlights to their eyes. (If using a fixed ambient light source such as a window, adjust your subject’s position until you get the same result.)
For softer shadow edges, diffuse the light source with a scrim, softbox, umbrella or (if using a window) sheer curtain.
To fill in shadow detail, place a reflector or dimmer second light on the opposite side of your subject.
Left: Butterfly lighting | Photo by Dmytro Tolokonov
Right: Clamshell lighting | Photo by Oz Seyrek
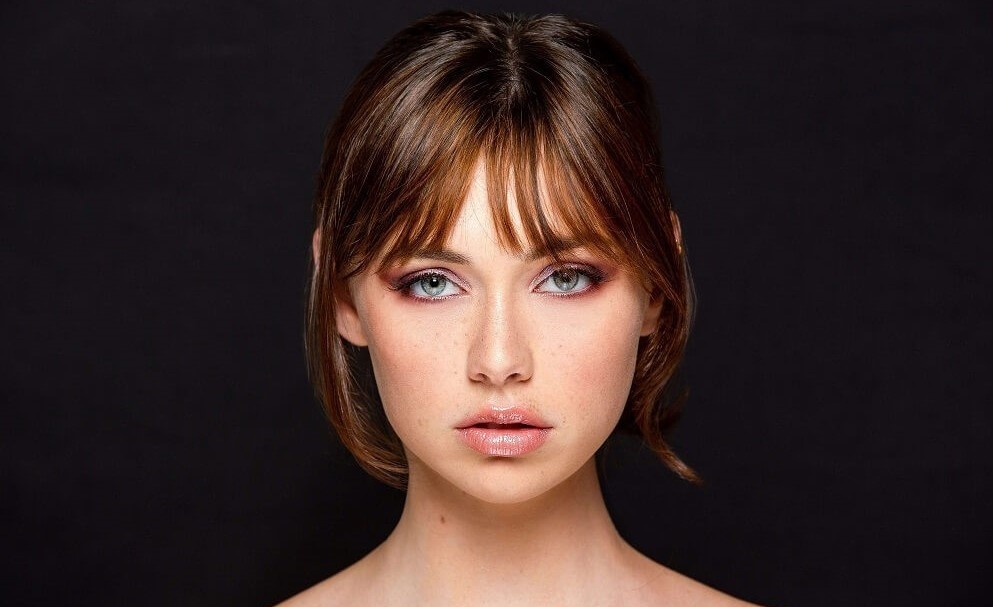
Butterfly Lighting (& Clamshell Lighting)
Butterfly lighting is distinguished by the butterfly-like shadow it creates under the subject’s nose, along with soft, subtle shadows under the chin and cheek bones. It’s ideal for glamour and beauty photography as it creates soft, even lighting while sculpting the shape of the face.
Butterfly lighting best flatters subjects with slim faces and defined cheekbones.
Left: Example of butterfly lighting
Right: Example of clamshell lighting
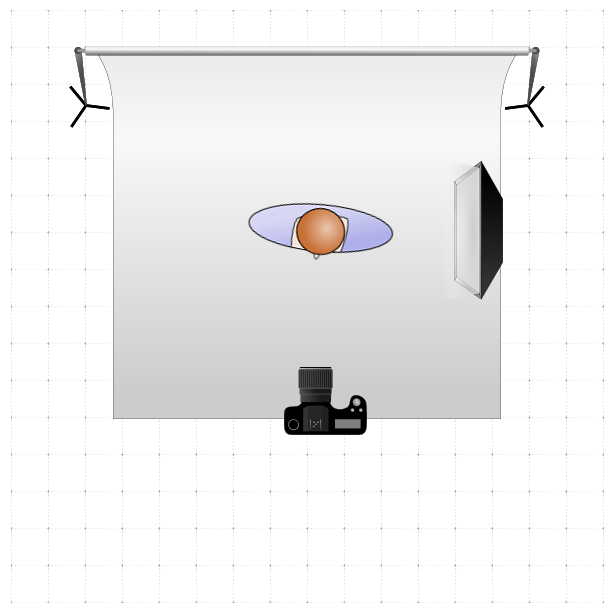
To create butterfly lighting, place a strobe Links to an external site. (modified using a softbox or beauty dish Links to an external site.) or a large LED ring light Links to an external site. right above and slightly behind your camera. It should be just high enough to produce catchlights in the subject’s eyes. To create more or less contrast, simply move the light slightly further from or closer to your subject.
If you want lighter shadows and a softer, higher key look, place a reflector or small softbox beneath the camera, with the base angled slightly up towards your subject. This lighting combination is known as clamshell lighting, as it resembles an open clamshell from side on.
Broad Lighting
Broad lighting is any style of lighting—split, loop, Rembrandt—in which the brightest side of the face is angled more towards the camera. This portrait lighting technique illuminates the majority of the face, making it suitable for high-key portraits.
Because it effectively broadens the foremost side of the face, broad lighting is ideal for accentuating cheeks or widening a slim face.
To create broad lighting, angle the subject away from the main light source and photograph them facing the bright side of their face.
Example of broad lighting setup
Short Lighting
Short lighting is basically the opposite of broad lighting. It describes any lighting style—split, loop, Rembrandt—in which the darker side of the face is angled more towards the camera. Because it puts most of the face in shadow, this type of portrait photography lighting setup works well for low-key portraits.
Short lighting has a slimming effect, making it flattering for most faces.
To create short lighting, angle the subject towards the main light source and photograph them facing the shadow side of their face.


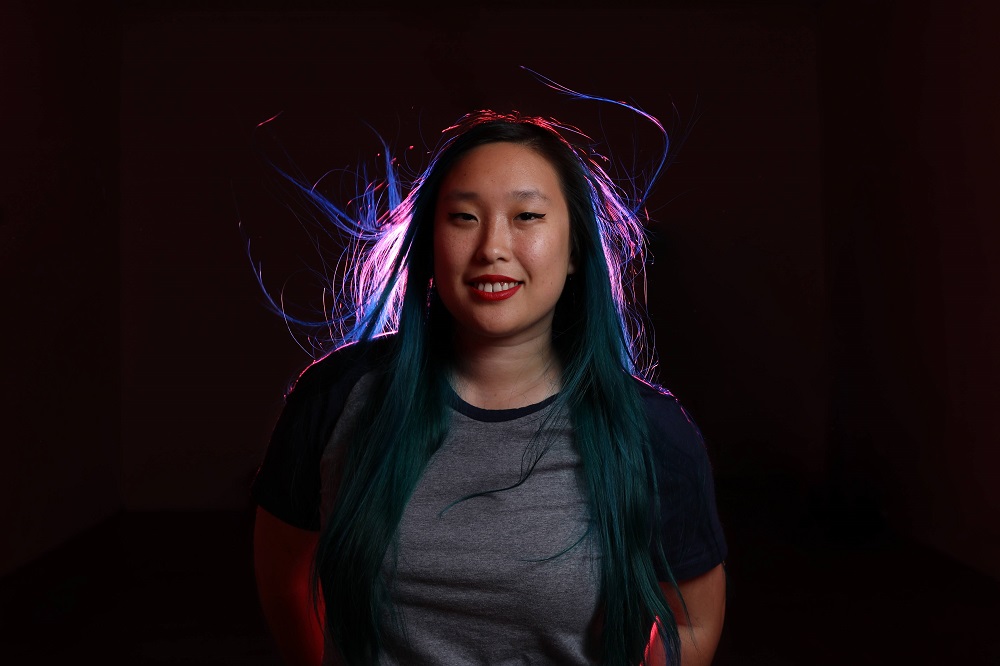
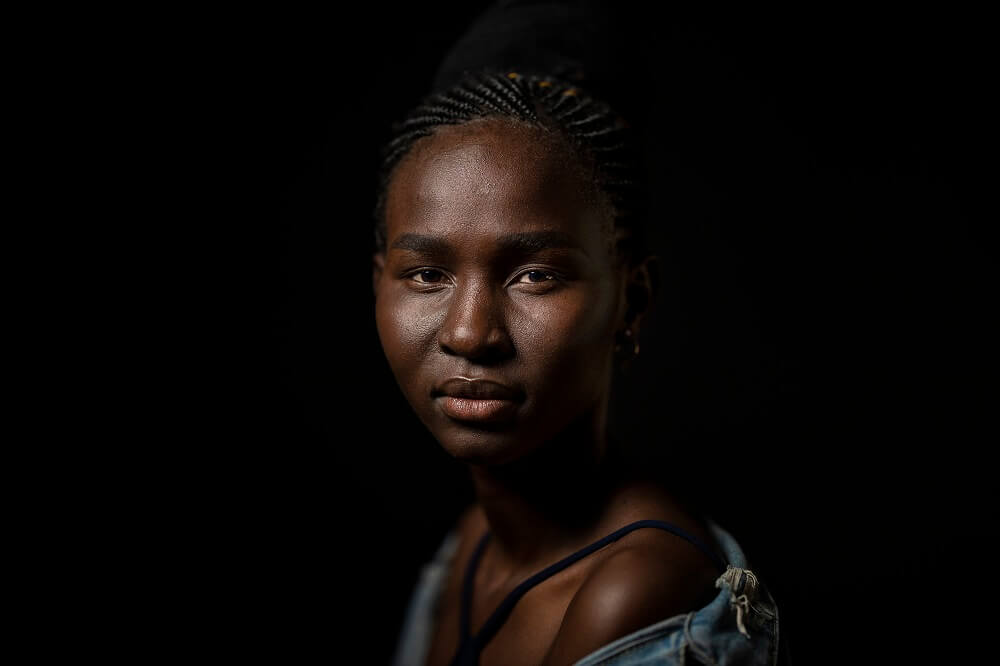
Back Lighting (Rim Lighting)
As the name suggests, back lighting (also known as rim lighting, hair lighting or edge lighting) involves lighting the subject from directly behind. Used effectively, whether in the studio or outdoors at golden hour, this creates a bright outline or ‘rim light’ that can really help define your subject.
For maximum results make sure the light source isn’t visible in frame.
a) You can dramatically silhouette your subject by using just a single light and exposing for the highlights – i.e. manually basing your exposure on the brightest areas, or underexposing until everything is black except for the highlights.
b) To capture a more balanced exposure (with all of your subject’s details visible), place a reflector or soft second light (e.g. softbox) between your subject and camera (out of frame) to fill in shadows.
As you can see, it takes little effort or equipment to create any—or all—of the different types of photography lighting above. And once you’ve mastered each style, you can dramatically change how it looks with a simple change of modifier, tweak in contrast ratio, or addition of other lighting.
With your portrait lighting perfected, you can devote the rest of your time to posing, framing and interacting with your subject.
Take a picture of one of your classmates using one of the techniques above and submit it to this assignment.
 Find Rubric
